※ 이 게시글은 크레이의 IT개발 관련 성장기를 다루고 있습니다. 관련지식이 약간 있어야 이해되실 수 있습니다. 가벼운 마음으로 읽어보시면서 흥미가 생기고 의욕이 생긴다면? 개발자의 자질이 있으신 겁니다 :)
15년 전만 해도 크레이가 근무한 IT업계 처우 환경은 매우 열악했는데요.
모든 기업이 그랬는지는 모르겠지만 몇몇 기업은 잦은 야근과 급한 일정 완수 등이 강요되어 왔지요.
젊을 때는 체력이 받쳐주어 일을 완수하기 위해 매일 매일 야근이며 급할 때는 2, 3일 연속 밤샘 개발 작업을 했던 적도 있었지요. 그렇게 10년 이상을 진행하다 보니 무리한 업무로 인해 병이 오게 되더군요.

그 이후로는 무리한 업무를 요구하는 직장은 가지 않기로 했습니다.
성경에도 아래와 같이 말씀하지요.
"사람이 만일 온 천하를 얻고도 제 목숨을 잃으면 무엇이 유익하리요 사람이 무엇을 주고 제 목숨을 바꾸겠느냐"
- 마태복음 16:26 -
2년 전 직장 사정으로 이직할 당시 몇몇 직장을 알아본 적이 있었는데요.
요새는 다행히 IT업계의 환경이 그렇게 열악한 곳이 많지 않아 다행인것 같습니다.
( 이전 직장도 처우는 좋은 편이었습니다. )
여러 회사 대표님들의 마인드가 '워라밸' 기업을 지향하는 추세인듯 합니다.
※ 워라밸 기업 = 워킹(일)과 라이프(생활)의 밸런스(균형) 있는 삶을 추구하는 기업
그래서 당시 좋은 직장에 스카웃되어 현재까지 잘 다니고 있습니다 :)

'라라벨' 프레임워크하면 웬지 '워라밸' 단어가 떠오르는데요.
라라벨을 사용함으로 개발자들은 워라벨을 이룰수 있을까요?
아직은 의문입니다.
라라벨에는 매우 많은 기능들이 이미 만들어져 있습니다.
예를 들면 페이지 기능이 전혀 구현되지 않은 게시글 목록에 페이지 기능을 추가하려 한다면
단 2줄의 코드를 추가하는 것으로 가능합니다.
게다가 입력 양식에서 입력값들이 비어있는지 검사한다든가 글자수 제한을 체크하거나 패스워드 중복 입력란의 내용이 동일한지 검사하는 기능들이 이미 만들어져 있는 것입니다. 그 사용법을 익혀 쓰는 것이지요.
개발의 재미는 감소하지만 안정된 기능을 가져다 사용한다는 점이 유리할 것으로 보입니다 :)

이번 게시글에서는 미래 상자 서비스의 구현 기능 중 레이아웃과 글 작성 및 검증, 검증메시지 한글화 부분에 대해 공유하는 시간을 가져보겠습니다.
블레이드 템플릿의 '레이아웃'
필자가 다뤄본 PHP템플릿으로는 코드이그나이터의 템플리트 언더바가 있는데요.
라라벨에서 사용하는 블레이드 템플릿은 그와는 약간 다른 특성이 있습니다.
바로 '레이아웃'을 적용하는 방법이지요. 방식이 희안해 초반에 약간 헤메였지요.대부분의 웹 서비스는 여러 웹페이지로 구성되어 있지만
반복되는 머리말과 꼬리말 영역은 각각의 웹페이지에 반복 작성하지는 않습니다.
왜냐하면 머리말과 꼬리말 중 공통된 부분을 수정하기 위해
모든 소스를 일일히 찾아가서 수정하는 수고를 덜기 위해서이지요.고전 PHP에서는 각각 머리말과 꼬리말 코드를 나누어 작성하고 include_once 또는 require_once 로 참조하는 방식을 취합니다.
<?
include_once('../head.html');

   // : 본 기능

include_once('../tail.html');
코드이그나이터의 템플리트 언더바도 사용법이 다를 뿐 위와 비슷한 방식이긴 한데요.
블레이드 템플릿은 약간 다른 방식을 취합니다.
그것은 기준이 되는 페이지 전체를 레이아웃 템플릿로 먼저 정의한 다음에
다른 템플릿에서 레이아웃 템플릿을 가져다(확장한다고 표현합니다) 빈 칸을 채워넣는 방식이기 때문입니다.
레이아웃 템플릿은 아래와 같습니다.
전체 HTML 페이지를 하나의 페이지로 구성하고 변경될 영역만 예약 영역으로 잡아줍니다.
< 레이아웃 템플릿 >
<!doctype html>
<html lang="en">

       : HTML 문서

    @예약('설명')
        :
    @예약('본문영역')
        :
</html>
그리고 각각의 뷰 템플릿 페이지는 레이아웃 템플릿을 가져다 쓰면서, 예약 영역만 다르게 채워넣습니다.
<뷰 템플릿 >
@확장('레이아웃 템플릿 이름')

@영역('설명')

  : 설명영역에 들어갈 HTML 페이지

@영역끝

@영역('본문영역')

  : 본문영역에 들어갈 HTML 페이지

@영역끝
실제로는 한글 '@예약, @확장, @영역, @영역끝'을 사용하는것이 아니라
각각 '@yield, @extends, @section, @endsection' 단어를 사용합니다.
라라벨 프레임워크가 영어권에서 개발되었기 때문이지요.
크레이가 만들었다면 영어도 한글도 가능하게 했을 겁니다 :)
<레이아웃 템플릿 - views/box/layout.blade.php>
<!doctype html>
<html lang="en">

       : HTML 문서

    @yield('description')
        :
    @yield('content')
        :
</html>
< 뷰 템플릿 >
※ @extends('box.layout')은 views/box/layout.blade.php 파일을 확장합니다.
@extends('box.layout')
@section('description')
: 설명영역에 들어갈 HTML 페이지
@endsection
@section('contents')
: 본문영역에 들어갈 HTML 페이지
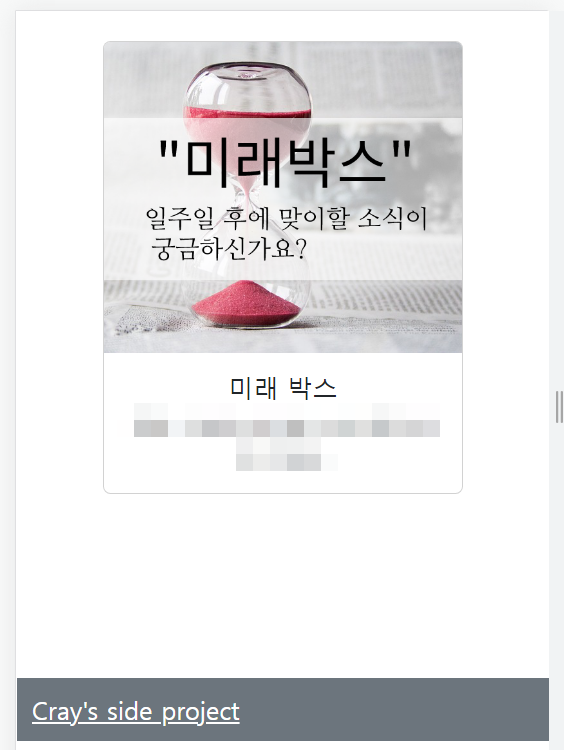
@endsection이 방식에 따라 미래박스 서비스에 레이아웃을 구성하였습니다.
이 레이아웃 템플릿이 글쓰기, 글수정, 삭제할 때도 함께 사용할 기본 틀인데요.
디자인은 뭐.. 아직 볼건 없습니다 ㅎ..
추후 기능들을 충분히 넣은 다음 꾸밀 예정입니다.
<!doctype html>
<html lang="en">
  <head>
    <meta charset="utf-8">
    <meta name="viewport" content="width=device-width, initial-scale=1">
    <title>미래박스</title>
    <link href="https://cdn.jsdelivr.net/npm/bootstrap@5.2.3/dist/css/bootstrap.min.css" rel="stylesheet" integrity="sha384-rbsA2VBKQhggwzxH7pPCaAqO46MgnOM80zW1RWuH61DGLwZJEdK2Kadq2F9CUG65" crossorigin="anonymous">
	<link rel="stylesheet" href="https://cdn.jsdelivr.net/npm/bootstrap-icons@1.7.1/font/bootstrap-icons.css">
  </head>
  <body>
	<div class="container text-center">
		<div class="card my-4" style="width: 18rem;margin:0 auto;">
		  <img src="/img/fbox.png" class="card-img-top" alt="미래박스">
		  <div class="card-body">
			<h5 class="card-title">미래 박스</h5>
			<p class="card-text">@yield('description')</p>
		  </div>
		</div>

		@yield('content')

	</div>

	<nav class="navbar navbar-dark bg-secondary mt-4">
		<div class="container-fluid">
			<span class="navbar-brand mb-0 h1"><a href='https://itadventure.tistory.com' class='text-white' target='_blank'>Cray's side project</a></span>
		</div>
	</nav>

    <script src="https://cdn.jsdelivr.net/npm/bootstrap@5.2.3/dist/js/bootstrap.bundle.min.js" integrity="sha384-kenU1KFdBIe4zVF0s0G1M5b4hcpxyD9F7jL+jjXkk+Q2h455rYXK/7HAuoJl+0I4" crossorigin="anonymous"></script>
  </body>
</html>
글 목록 페이지는 레이아웃 페이지를 불러와 사용하기 때문에 아래와 같이 단순해졌지요.
@extends('box.layout')

@section('description')
	일주일 후에 열려라! 친구들이 숨겨놓은 이야기를 만나보세요.
@endsection

@section('content')

	<table class="table">
	<tr class="table bg-primary text-white">
	<td>제목</td>
	<td>작성자</td>
	<td>오픈</td>
	<td></td>
	</tr>
	<?php $keycnt=1; ?>
	@foreach ($boxes as $box)
	<tr>
	<td>{{ $box->title }}</td>
	<td>{{ $box->writer }}</td>
	<td>{{ $box->opendate }}</td>
	<td>
		<i style="cursor:pointer;" class="bi bi-pen"
			onclick="location.href='{{ url('/box/edit/' . $box->id ) }}'"></i>
		<i style="cursor:pointer;" class="bi bi-x-square-fill"
			onclick="location.href='{{ url('/box/deletepass/' . $box->id ) }}'"></i>
	</td>
	</tr>
	<tr>
	<td colspan=4>

		<div class="accordion" id="accordionPanelsStayOpenExample">
		  <div class="accordion-item">
			<h2 class="accordion-header" id="panelsStayOpen-headingOne">
			  <button class="accordion-button collapsed" type="button"
               data-bs-toggle="collapse"
               -bs-target="#panelsStayOpen-collapse{{ $keycnt }}"
               aria-expanded="false" aria-controls="panelsStayOpen-collapseOne">
				<i class="bi bi-archive-fill mx-1"></i>
				미래 상자에는 무슨 내용이 들어 있을까요 ?
			  </button>
			</h2>
			<div id="panelsStayOpen-collapse{{ $keycnt }}"
            	class="accordion-collapse collapse"
                aria-labelledby="panelsStayOpen-headingOne">
			  <div class="accordion-body">
				{!! $box->body !!}
			  </div>
			</div>
		  </div>
		</div>
	</td>
	</tr>
	<?php $keycnt++; ?>
	@endforeach
	</table>

	{{ $boxes->links() }}

	<button type="button" class="btn btn-primary"
      onclick="location.href='{{ url('/box/write') }}'">쓰삭 쓰삭</button>

@endsection
결과 화면은 아래와 같습니다.
수정, 삭제 아이콘과 페이지, 글 작성 버튼이 추가되었지요.

글 작성 페이지
글 작성 버튼은 단순히 링크로 하되 라라벨 스타일대로 하였는데요.
<button type="button" class="btn btn-primary"
  onclick="location.href='{{ url('/box/write') }}'">쓰삭 쓰삭</button>
버튼을 클릭하면, 라우터 -> 컨트롤러 -> 뷰로 이동합니다.
< 라우터 - route/web.php >
Route::get('/box/write', 'BoxController@write');라우터는 BoxController 컨트롤러의 write() 메서드를 실행합니다.
< 컨트롤러 - app/Http/Controllers/BoxController.php >
public function write(Request $request)
{
    // 보안 : 세션 갱신
    $request->session()->regenerate();
    return view('box.write');
}
그리고 컨트롤러에서는 글을 작성하는 뷰로 넘어가도록 합니다.
잠깐, 여기서 라라벨이 제공하는 csrf 라는 보안토큰이라는 기능이 있는데요.
악성 사용자가 매크로 프로그램으로 무한정 글을 자동 작성하는 것을 막아주는 보안 기능입니다.
이 토큰은 세션이 만료될 때까지 동일한 값을 유지하지만,
아래 명령어를 실행하면 매번 토큰값이 새롭게 갱신됩니다.
$request->session()->regenerate();
사용자가 무언가를 입력하기 전에만 한번 작동시켜주면 보안토큰이 새로 갱신되어
보안이 더욱 강력해지는 효과가 있는 것이지요. 다만 이 명령어는 여기서 필수는 아니기 때문에 제외해주어도 됩니다.
이 것도 마음 먹고 덤비면 뜷는 방법이 있으니 실 서비스에서는 자동 입력 방지 문자와 같은 방법을 강구할 필요가 있습니다.
< 뷰 - resources/views/box/write.blade.php >
@extends('box.layout')

@section('description', '일주일 후에 공개될 비밀상자 게시글을 작성해 보세요.')

@section('content')

@if ($errors->any())
	@foreach ($errors->all() as $error)
		<div class="alert alert-danger">
			{{ $error }}
		</div>
	@endforeach
@endif

	<form method='post' action='/box/writepost'>
		@csrf
		<div class="form-floating mb-1">
		  <input type="text" class="form-control" id="title" name="title"
            placeholder="제목" value="{{ old('title') }}" required>
		  <label for="title">제목</label>
		</div>
		<div class="form-floating mb-1">
		  <input type="text" class="form-control" id="writer" name="writer"
            placeholder="닉네임" value="{{ old('writer') }}">
		  <label for="writer">닉네임</label>
		</div>
		<div class="form-floating mb-1">
		  <input type="password" class="form-control" id="pwd" name="pwd"
            placeholder="비밀번호">
		  <label for="pwd">비밀번호</label>
		</div>
		<div class="form-floating mb-1">
		  <input type="password" class="form-control" id="pwd2" name="pwd2"
            placeholder="비밀번호 확인" required>
		  <label for="pwd2">비밀번호 확인</label>
		</div>
		<div class="form-floating mb-3">
			<textarea class="form-control" id="body" name="body" rows="3"
              placeholder="일주일 뒤 공개될 숨김글을 작성하세요!"
              style="height: 100px;">{{ old('body') }}</textarea>
			<label for="body">일주일 뒤 공개될 숨김글을 작성하세요!</label>
		</div>

		<button type="submit" class="btn btn-primary">쓰삭 끝!</button>
		<button type="button" class="btn btn-primary"
          onclick="location.href='/box'">목록</button>

	</form>

@endsection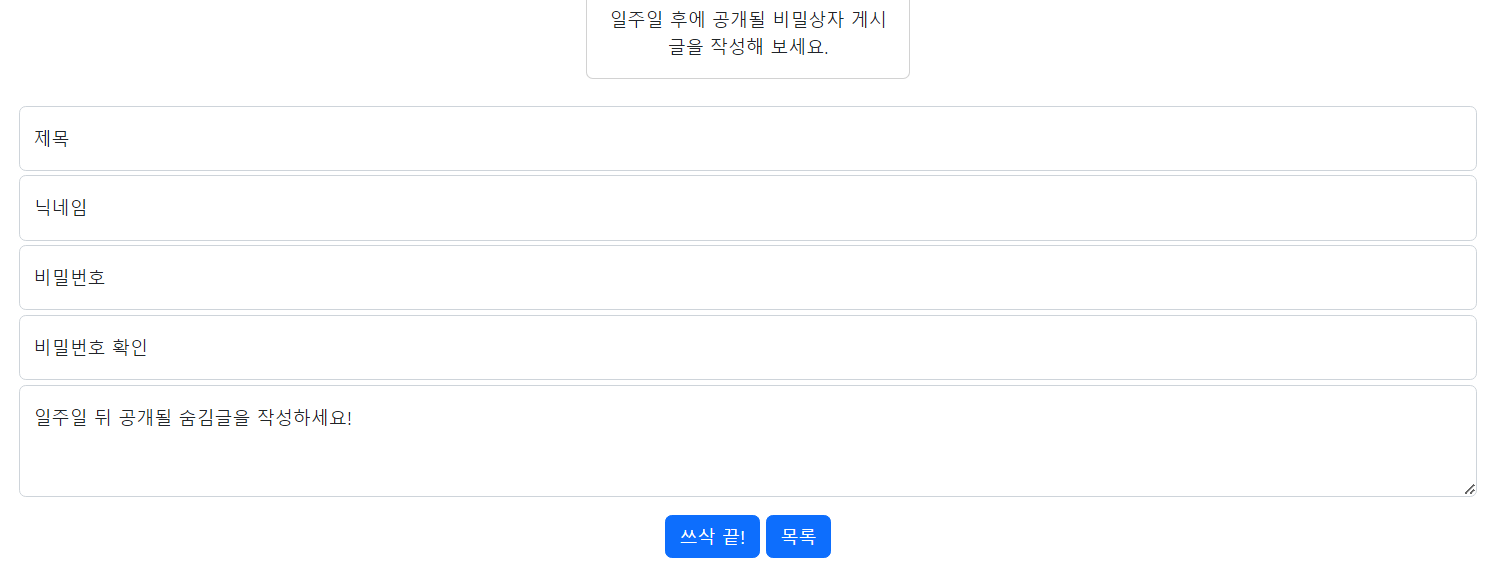
뷰에서는 새로운 글을 작성하기 위한 HTML 문서가 구성되는데요.
HTML 기본 기능 외에 몇가지 생소한 부분이 보이실 겁니다.@csrf 라고 적힌 부분은 앞에서도 말씀드린 바와 같은 라라벨의 보안 토큰인데요.
라라벨은 모든 입력 양식에 대해 보안 토큰을 필수로 포함해주어야 합니다.
뷰에 포함해주어야 하는 것이지요. 그리고 그 값이 일정주기별로 바뀌는데요.
여기서는 매번 페이지에 접근할 때마다 바뀌게 하였습니다.
@csrf 는 최종 웹페이지에서는 _token 이라는 이름의 히든 태그로 치환되는데요.
<input type="hidden" name="_token" value="rALhfw2MgcUelAA72aNAsZQDjTEqRUtqoZjxAQ8S">
이 토큰 값은 폼 양식을 전송할 때 일치여부를 확인하는 용도로 사용되기 때문에 약한 매크로는 이를 뜷을 수 없습니다.
그 외에도 {{ old('title') }} 이라든가, $errors->any()와 같은 부분이 있는데요. 이 부분은 순서대로 설명이 필요하기 때문에 잠시 후에 설명드리겠습니다.
글작성 액션
이제 글의 내용을 작성하고 글 작성 완료 버튼을 선택하면 실제로 글이 저장될 액션을 실행하게 되는데요.

이 때 성공, 실패 여부에 따라 2가지의 경로로 노선이 갈립니다.
라우터 -> 컨트롤러
-> 1) 실패시 입력폼으로 복귀
-> 2) 성공시 글을 저장하고 목록으로 리다이렉트
보통 사용자가 작성한 글을 그대로 저장하는 경우는 드뭅니다.
제목이나 작성자 이름을 공란으로 입력하였거나 본문의 길이가 너무 짧거나 하면 이를 검사해서 재입력을 요구해야 하기 때문이지요. 자바스크립트로만 검사하는 기능을 구현할 수는 있지만 이 역시 쉽게 뜷어버리는 실력자들이 있기 때문에 최종 검증은 서버에서 수행하여야 합니다.
라라벨은 이러한 검증에 대한 상당히 놀라운 기능을 제공하는데요.
검증 모듈을 쉽게 구현할 수 있음은 물론, 오류 원인 표시 외에도 페이지가 전환되었지만 이미 입력했던 내용을 그대로 유지해서 보여주기까지 할 수 있기 때문입니다.
보통은 이런 검증은 한땀 한땀 코드를 작성하는 것이 일반적입니다.
하나씩 과정을 살펴보겠습니다.
글 작성 버튼을 클릭하면 라우터로 넘어가는데요.
이 때 POST 전송이 되기 때문에 아래 라우터가 받아서
BoxController컨트롤러의 writepost() 메소드에 전달합니다.
Route::post('/box/writepost', 'BoxController@writepost');컨트롤러의 메소드는 처음에 아래와 같이 작성하였는데요.
public function writepost(Request $request)
{
    // 유효성 검사
    $request->validate([
        'title' => 'required',
        'writer' => 'required',
        'pwd' => 'required|min:6',
        'pwd2' => 'same:pwd',
        'body' => 'required|min:100',
    ]);

    Box::write($request);

    return redirect('/box');
}
$request->validate() 는 규칙에 따라 검증을 하고, 검증이 실패하면 다시 입력받기 위해 이전 입력 양식으로 화면을 되돌리는 기능을 수행합니다.
'required' 는 필수입력이라는 의미인데요. 만일 아래와 같이 규칙을 정해주면 제목에 해당하는 title 이 공란일 경우 다음 단계를 진행하지 않고 이전 입력 화면으로 되돌아 갑니다.
$validated = $request->validate( [ 'title' => 'required' ] );
그러한 규칙을 여러 입력 항목에 각각 적용할 수 있는데요.
아래 내용은 title, writer, pwd, body 는 필수 입력이라는 의미이고,
pwd2 에서 사용된 'same:pwd'는 pwd2 ( 패스워드 확인 ) 란이 pwd ( 패스워드 ) 란과 동일해야 하는 규칙이고, min:6 과 같은 부분은 최소 6글자 이상이어야 한다는 의미입니다.
$request->validate([
    'title' => 'required',
    'writer' => 'required',
    'pwd' => 'required|min:6',
    'pwd2' => 'same:pwd',
    'body' => 'required|min:100',
]);
그리고 2가지 규칙을 모두 적용해야 할 경우 파이프( | ) 기호를 이용하여 규칙을 구분해 정해주면 되는 것입니다. ( 'require}min:100' )
이 모든 규칙을 만족한다면 다음 코드로 진행하지만 하나라도 규칙에 어긋나면 이전 입력 폼으로 복귀하는데요. 복귀할 때 특별한 2가지 기능이 수행됩니다.
첫째는 오류의 원인이 되는 오류메시지를 자동 생성해서 전달해 줍니다.
둘째는 원래 입력했던 각 항목의 값을 전달해 줍니다.
오류메시지는 $errors 라는 변수로 전달되는데요.
뷰에 보면 아래와 같은 코드가 존재합니다.
이 부분이 바로 오류 내용을 표시하는 부분입니다.
@if ($errors->any())
	@foreach ($errors->all() as $error)
		<div class="alert alert-danger">
			{{ $error }}
		</div>
	@endforeach
@endif
출력 화면을 예시로 들면 아래와 같습니다.
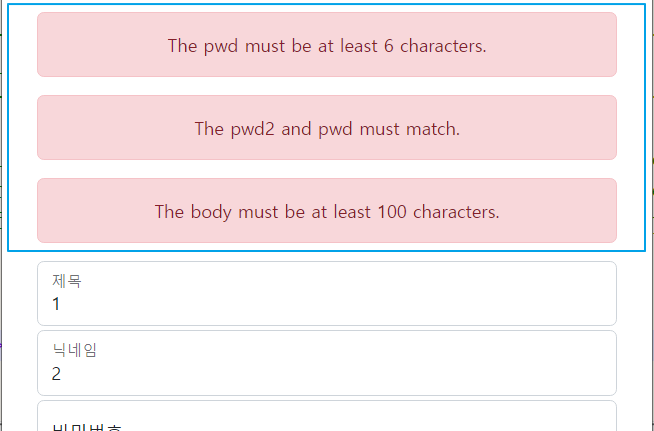
위와 같은 문구가 자동으로 출력된다니 괜찮긴 한데, 한글로 표시할 수 없을까요?
오류 메시지를 한글로 표시하기 위해서는 먼저 한글 오류 메시지를 정의해야 합니다.
resources/lang/ 폴더에 보면 en 이라는 폴더만 하나 존재할 텐데요.
ko 폴더를 하나 생성하고 난 다음 en 폴더의 validation.php 파일을 ko 폴더에 복사해 주시면 됩니다.
그리고 ko/validation.php 파일을 아래와 같이 수정해주면 되는데요.
오류 메시지가 워낙 많아, 본 예제에서 다루는 메시지가 일부 최소한의 메시지만 수정해 보았습니다.
resources/lang/ko/validation.php
<?php

return [

    /*
    |--------------------------------------------------------------------------
    | Validation Language Lines
    |--------------------------------------------------------------------------
    |
    | The following language lines contain the default error messages used by
    | the validator class. Some of these rules have multiple versions such
    | as the size rules. Feel free to tweak each of these messages here.
    |
    */

    'accepted' => ':attribute 이 수락되어야 합니다.',
    'active_url' => ':attribute 은 유효한 URL 주소가 아닙니다.',
    'after' => ':attribute 은 :date 날짜 이후여야 합니다.',
    'after_or_equal' => ':attribute 은 :date 날짜 또는 그 이후여야 합니다.',
    'alpha' => ':attribute 은 알파벳 문자민 포함합니다.',
    'alpha_dash' => ':attribute 은 알파벳, 숫자, 대시기호와 언더바 기호만을 포함합니다.',
    'alpha_num' => ':attribute 은 알파벳, 숫자만을 포함합니다.',
    'array' => ':attribute 은 배열이어야 합니다.',
    'before' => ':attribute 은 :date 이전 날짜여야 합니다..',
    'before_or_equal' => ':attribute 은 :date 날짜 또는 그 이전 날짜여야 합니다.',
    'between' => [
        'numeric' => 'The :attribute must be between :min and :max.',
        'file' => 'The :attribute must be between :min and :max kilobytes.',
        'string' => 'The :attribute must be between :min and :max characters.',
        'array' => 'The :attribute must have between :min and :max items.',
    ],
    'boolean' => 'The :attribute field must be true or false.',
    'confirmed' => 'The :attribute 확인란이 일치하지 않습니다.',
    'date' => 'The :attribute is not a valid date.',
    'date_equals' => 'The :attribute must be a date equal to :date.',
    'date_format' => 'The :attribute does not match the format :format.',
    'different' => 'The :attribute and :other must be different.',
    'digits' => 'The :attribute must be :digits digits.',
    'digits_between' => 'The :attribute must be between :min and :max digits.',
    'dimensions' => 'The :attribute has invalid image dimensions.',
    'distinct' => 'The :attribute field has a duplicate value.',
    'email' => 'The :attribute must be a valid email address.',
    'ends_with' => 'The :attribute must end with one of the following: :values',
    'exists' => 'The selected :attribute is invalid.',
    'file' => 'The :attribute must be a file.',
    'filled' => 'The :attribute field must have a value.',
    'gt' => [
        'numeric' => 'The :attribute must be greater than :value.',
        'file' => 'The :attribute must be greater than :value kilobytes.',
        'string' => 'The :attribute must be greater than :value characters.',
        'array' => 'The :attribute must have more than :value items.',
    ],
    'gte' => [
        'numeric' => 'The :attribute must be greater than or equal :value.',
        'file' => 'The :attribute must be greater than or equal :value kilobytes.',
        'string' => 'The :attribute must be greater than or equal :value characters.',
        'array' => 'The :attribute must have :value items or more.',
    ],
    'image' => 'The :attribute must be an image.',
    'in' => 'The selected :attribute is invalid.',
    'in_array' => 'The :attribute field does not exist in :other.',
    'integer' => 'The :attribute must be an integer.',
    'ip' => 'The :attribute must be a valid IP address.',
    'ipv4' => 'The :attribute must be a valid IPv4 address.',
    'ipv6' => 'The :attribute must be a valid IPv6 address.',
    'json' => 'The :attribute must be a valid JSON string.',
    'lt' => [
        'numeric' => 'The :attribute must be less than :value.',
        'file' => 'The :attribute must be less than :value kilobytes.',
        'string' => 'The :attribute must be less than :value characters.',
        'array' => 'The :attribute must have less than :value items.',
    ],
    'lte' => [
        'numeric' => 'The :attribute must be less than or equal :value.',
        'file' => 'The :attribute must be less than or equal :value kilobytes.',
        'string' => 'The :attribute must be less than or equal :value characters.',
        'array' => 'The :attribute must not have more than :value items.',
    ],
    'max' => [
        'numeric' => 'The :attribute may not be greater than :max.',
        'file' => 'The :attribute may not be greater than :max kilobytes.',
        'string' => 'The :attribute may not be greater than :max characters.',
        'array' => 'The :attribute may not have more than :max items.',
    ],
    'mimes' => 'The :attribute must be a file of type: :values.',
    'mimetypes' => 'The :attribute must be a file of type: :values.',
    'min' => [
        'numeric' => 'The :attribute must be at least :min.',
        'file' => 'The :attribute must be at least :min kilobytes.',
        'string' => ':attribute 은 최소 :min 글자 이상이어야 합니다.',
        'array' => 'The :attribute must have at least :min items.',
    ],
    'not_in' => 'The selected :attribute is invalid.',
    'not_regex' => 'The :attribute format is invalid.',
    'numeric' => 'The :attribute must be a number.',
    'present' => 'The :attribute field must be present.',
    'regex' => 'The :attribute format is invalid.',
    'required' => ':attribute 항목은 필수입니다.',
    'required_if' => 'The :attribute field is required when :other is :value.',
    'required_unless' => 'The :attribute field is required unless :other is in :values.',
    'required_with' => 'The :attribute field is required when :values is present.',
    'required_with_all' => 'The :attribute field is required when :values are present.',
    'required_without' => 'The :attribute field is required when :values is not present.',
    'required_without_all' => 'The :attribute field is required when none of :values are present.',
    'same' => ':attribute 과 :other 항목이 일치하지 않습니다.',
    'size' => [
        'numeric' => 'The :attribute must be :size.',
        'file' => 'The :attribute must be :size kilobytes.',
        'string' => 'The :attribute must be :size characters.',
        'array' => 'The :attribute must contain :size items.',
    ],
    'starts_with' => 'The :attribute must start with one of the following: :values',
    'string' => 'The :attribute must be a string.',
    'timezone' => 'The :attribute must be a valid zone.',
    'unique' => 'The :attribute has already been taken.',
    'uploaded' => 'The :attribute failed to upload.',
    'url' => 'The :attribute format is invalid.',
    'uuid' => 'The :attribute must be a valid UUID.',

    /*
    |--------------------------------------------------------------------------
    | Custom Validation Language Lines
    |--------------------------------------------------------------------------
    |
    | Here you may specify custom validation messages for attributes using the
    | convention "attribute.rule" to name the lines. This makes it quick to
    | specify a specific custom language line for a given attribute rule.
    |
    */

    'custom' => [
        'attribute-name' => [
            'rule-name' => 'custom-message',
        ],
    ],

    /*
    |--------------------------------------------------------------------------
    | Custom Validation Attributes
    |--------------------------------------------------------------------------
    |
    | The following language lines are used to swap our attribute placeholder
    | with something more reader friendly such as "E-Mail Address" instead
    | of "email". This simply helps us make our message more expressive.
    |
    */

    'attributes' => [],

];
그리고 하나 더 변경해줄 부분이 있습니다.
config/app.php 파일에서 locale 변수값을 'en'에서 'ko'로 변경해주어야 합니다.
    :
  'locale' => 'ko',
    :
그러면 오류 검증 메시지가 한글로 바뀌게 되고 오류 발생시 아래처럼 한글로 표시됩니다.
뭐 pwd 라든가 body 등의 필드명은 원래 영문이니 어쩔수 없지만요.

이마저도 변경은 가능합니다만 반자동입니다.
컨트롤러 단에서 이래와 같이 한땀한땀 각 항목에 해당하는 오류 메시지($messages)를 정의해주면 되는데요.
그래도 코드를 한땀 한땀 짜넣는 방식보다는 시간비용 투자면에서 훨씬 이득이지요.
$messages = [
    'title.required' => '제목을 입력하세요',
    'writer.required' => '작성자를 입력하세요',
    'pwd.required' => '패스워드를 입력하세요',
    'pwd.min' => '패스워드는 최소 6글자 이상입니다.',
    'pwd2.same' => '패스워드 확인이 일치하지 않습니다.',
    'body.required' => '본문을 입력하세요',
    'body.min' => '박스글은 100글자 이상 작성하셔야 합니다.'
];

// 유효성 검사
$request->validate([
    'title' => 'required',
    'writer' => 'required',
    'pwd' => 'required|min:6',
    'pwd2' => 'same:pwd',
    'body' => 'required|min:100',
 ], $messages);
결과가 훨씬 깔끔해졌군요.

그리고 또 한가지 원래 입력했던 값을 다시 입력폼에 전달해준다고 했는데요.
이는 비록 모든 항목에 만족할 만한 값을 입력하지 못했다 하더라도,
입력했던 내용이 비워진 채로 있으면 글을 작성하다 포기해버릴수 있기 때문이지요.

검증 실패시 {{ old('항목') }} 표현식은 이전에 입력했던 값을 보관하고 있기 때문에,
아래와 같이 태그를 작성해주면
<div class="form-floating mb-1">
  <input type="text" class="form-control" id="title" name="title"
    placeholder="제목" value="{{ old('title') }}" required>
  <label for="title">제목</label>
</div>
<div class="form-floating mb-1">
  <input type="text" class="form-control" id="writer" name="writer"
    placeholder="닉네임" value="{{ old('writer') }}">
  <label for="writer">닉네임</label>
</div>
검증 실패 후 다시 입력 페이지로 돌아와도 아래와 같이 입력 양식이 채워져 있게 됩니다.
그래서 글을 작성하는데 사용자의 불편함이 덜하게 되는 것입니다.

작성한 글의 검증이 정상으로 완료되면 컨트롤러에서 글을 저장하고 목록 화면으로 돌아가게 되는데요.
           :
    Box::write($request);
    return redirect('/box');
}
Box 는 boxes 테이블을 관리하는 모델 클래스이며,
아래와 같은 write() 메소드를 구현하였습니다.
엘로퀀트 클래스를 상속받기 때문에 SELF::create() 문으로 쉽게 자료 입력이 가능한 것이지요.
<?php

namespace App;

use Illuminate\Database\Eloquent\Model;
use Illuminate\Http\Request;
use Carbon\Carbon;
use App\HangulTime;

use Hash;

class Box extends Model
{
    protected $fillable = ['title', 'writer', 'pwd', 'body', 'opendate'];
              :
    public static function write(Request $request)
    {
        // 글 저장
        SELF::create([
            'title' => $request->get('title'),
            'writer' => $request->get('writer'),
            'pwd' => bcrypt($request->get('pwd')),
            'body' => $request->get('body'),
            'opendate'=> Carbon::now()->timezone('Asia/Seoul')->addDays(7)
        ]);
    }
참고로 bcrypt() 는 라라벨의 헬퍼함수로 사용자가 입력한 패스워드를 높은 수준의 암호화 기술을 적용하여 암호화해 보관해 줍니다. 이렇게 입력한 패스워드는 개발자라 할지라도 원 패스워드를 알 방법은 없지요.
이렇게 암호화해 보관해야 법적으로 문제가 안됩니다.
그리고 Carbon::now()->timezone('Asia/Seoul')->addDays(7) 은 한국시간으로 일주일 뒤에 게시글이 오픈된다는 오픈 일정을 산출해 줍니다.
아무쪼록 필요하신 분께 도움이 되셨을지요.
프레임워크로 진행하다 보니 내용이 방대하여 기초 지식에 대한 부분은 설명 드리지 못하는 부분이 아쉽습니다.
아무쪼록 방문하시는 모든 분들께 감사드리구요.
내일까지 몹시 춥다고 하네요.
출근길 단단히 준비하셔서 아무 사고 없으시길 바라는 바입니다. :)
다음 게시글 : https://itadventure.tistory.com/610
크레이의 라라벨 도전기 #9. 되묻지마! 패스글 시스템
※ 이 게시글은 크레이의 IT개발 관련 성장기를 다루고 있습니다. 관련지식이 약간 있어야 이해되실 수 있습니다. 가벼운 마음으로 읽어보시면서 흥미가 생기고 의욕이 생긴다면? 개발자의 자질
itadventure.tistory.com
'코드이그나이터와 php7와 mysql' 카테고리의 다른 글
| 윈도우에 PHP 8 설치 + MYSQL 연결 예제 ( APM 설치 - 2023. 9. 1기준) (1) | 2023.09.01 |
|---|---|
| 크레이의 라라벨 도전기 #9. 되묻지마! 패스글 시스템 (6) | 2023.01.27 |
| 크레이의 라라벨 도전기 #7. 컨트롤러 + 모델(엘로퀀트 all) + 뷰 (2) | 2023.01.20 |
| 크레이의 라라벨 도전기 #6. 마이그레이션 (4) | 2023.01.16 |
| 크레이의 라라벨 도전기 #5 - 팅커! 팅커벨? PHP콘솔이라네.. (0) | 2023.01.14 |


